Pretty String Art- A is for Apple! #DIY #Craft
Ever wander through the thrift store and eyeball an old wooden cutting board? Well, I did! What to do with it? Instead of using it for the boring purpose of cutting vegetables, I came up with a way to make my cutting board have a whole new life! This is Suzy from Suzy’s Sitcom, and I’m going to show you how to make pretty A is for Apple String Art!
Most cutting boards that you find at the thrift store have been used well past their prime. I switched to the plastic ones years ago because I could wash them in the dishwasher and be sure they were very clean. Wooden ones- well love the look, but would rather cut my veggies on something that is sanitized. So with that said, I came up with a way to revamp an old cutting board with string art.
For the project I used:
Wooden cutting board
Small nails
Embroidery Floss in Red and Green
Acrylic Paint
White glue
Stencils for lettering
Begin by painting the center piece of the cutting board with off white acrylic paint. Several coats were required. That old wood just soaks up the paint!
Then draw in the shape of an apple with a leaf. These are the lines to follow when you place the nails.
Using a hammer, hammer in the small nails about 3/4″ apart along the drawn in lines.
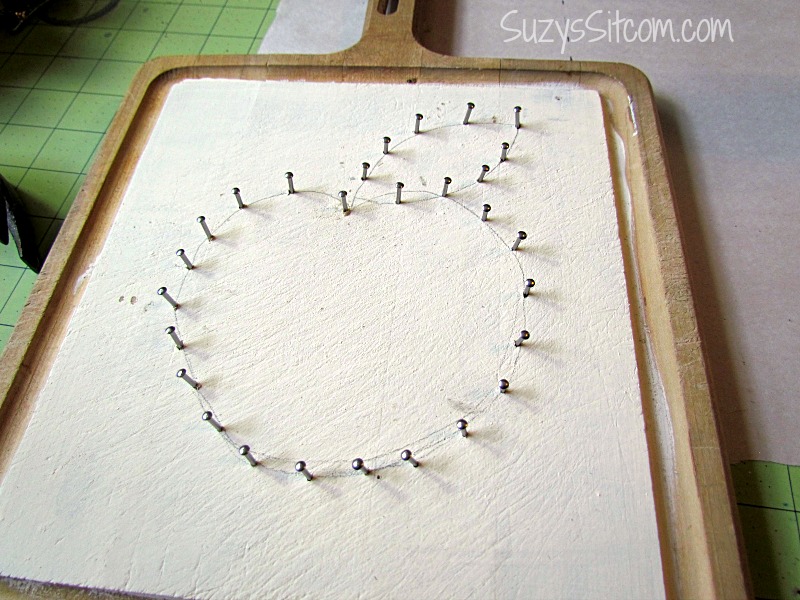
You want there to be about 1/4″ of nail showing.
Begin with the red embroidery floss. Tie it around one nail head and then begin wrapping it from side to side, filling in the shape of the apple.
At some point while wrapping, be sure to wrap around the outside edges, outlining the shape of the apple.
Keep wrapping the floss around the nail heads until you have filled the apple to you satisfaction. In order to end the wrapping, I found it easiest to add a dot of hot glue to one of the nails and end the string there.
Use the same technique to fill in the green leaf.
Use a stencil, or draw freestyle, the word “Apple” and the letter A. Use green acrylic paint to fill in the lettering.
Use the same green paint to paint the rest of the cutting board (It may take two coats). Allow it to dry thoroughly before going to the next step.
The fully detailed procedure to create the crackle paint look using acrylic paint and white glue can be found here: Easy Fabric Wall Art. Basically, paint white glue everywhere that you are wanting the crackle effect. Work quickly and before the glue dries, add a coat of acrylic paint over top. As the glue dries, the paint crackles! In the photo above, it is just starting to dry.
The final piece has a sweet country look to it. What a nice addition to my kitchen wall! I love the texture of the layered string! And the entire project just cost pennies to make!

Suzy’s Sitcom features arts, crafts and humor, with a specialty in vintage and recycled crafts; and currently hosts over 150 detailed original DIY and craft tutorials. Join the fun!

laura108 says
I love it Arune. I’d love to feature it if you would like. DIY’s are right up my alley 🙂
Arune says
What do you think of this DIY video? We made it for a school project and would love your feedback: https://www.youtube.com/watch?v=toiTpK4n-LQ
laura108 says
Thank you so much Katherine. Suzy is an amazing artist.
Katherine G from La La Land Mommy says
I love this. This is so cute and creative!